Remote development on Apocrita with Visual Studio Code

Visual Studio Code (VS Code) is an open-source and lightweight text editor from Microsoft, and distinctly different from Visual Studio. In this short tutorial we aim to set up VS Code for remote interfacing and development on Apocrita, to edit, save, and manipulate our files and directories.
Improper Use of VS Code for Computational Workloads
We've observed a significant increase in users utilising VS Code on Apocrita. However, some users are bypassing the proper job scheduling system by running computational jobs directly through VS Code on the login nodes. This practice violates our Apocrita Usage Policy and can negatively impact cluster performance.
- Always use the designated job scheduler for computational tasks.
- VS Code should be used for code editing and development only, not for executing resource-intensive jobs.
- Continued misuse may result in account suspension.
If you need guidance on properly submitting jobs through our scheduler, please refer to our documentation or contact the HPC support team.
Introduction
VS Code has a growing list of built-in features and third-party extensions. It packages its text editor with a built-in Git source control system, a file explorer, program debugging and running functionality, and IntelliSense for several programming languages. Along with its flexible extension list, it's a solid alternative to other, more established editors.
Integrating VS Code with Apocrita is principally aimed to those of you that
already work with it locally, as it naturally extends its usability.
I have been exclusively using VS Code on Apocrita for 2 years to
view and edit my qsub scripts, private modules, source code, and
log files. VS Code remembers which files are opened under any specific
directory, so my workflow is not interrupted if I move between entirely
different subjects. My local development environment is also being
replicated on Apocrita by integrating the extensions with the Apocrita
compilers, vetting source code for warnings and errors, or linting issues.
Other, more niche, applications are also possible.
Prerequisites
The small list of prerequisites includes a new installation of VS Code and an SSH key setup on Apocrita.
VS Code has install binaries for Linux, Windows, and MacOS. They are available through the download page.
Following a successful installation, we need to couple our public Apocrita SSH key to VS Code. The public SSH key must be generated and uploaded to Apocrita beforehand. Our online documentation has detailed instructions on how to generate a public key, which you will then need to upload to Apocrita. An overview of the process can also be found on one of our recent blog posts.
Some differences exist between operating systems. In Linux and MacOS, the SSH
keys are assumed to be saved under ~/.ssh/, where ~/ is your home directory.
In Windows, the key is a public key file generated by PuTTY
(.ppk):
- open PuTTYgen
- load the
.ppkkey - go to "Conversions" menu
- export "OpenSSH key"
- save as "key.openssh"
Setting up the SSH key
Connecting remotely to a server through VS Code is enabled by the extension
"Remote Development", which can be installed
manually through the extension page.
Alternatively, launch VS Code, use Quick Open (Ctrl+P), paste the external
install command ext install ms-vscode-remote.vscode-remote-extensionpack and
press enter to confirm.
Once the package is installed, a new green UI element will appear at the bottom left, as seen on Figure 1.
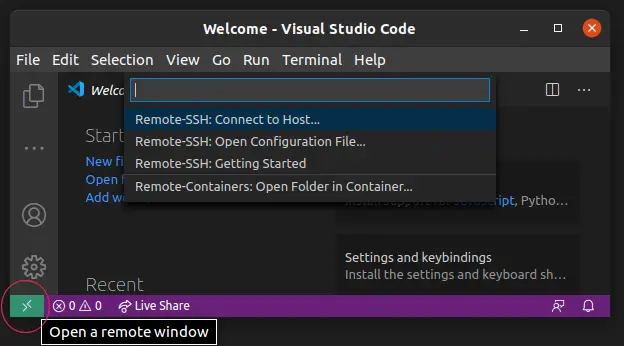
Figure 1: Green UI element at the bottom left (inside the red circle)
Configuration file
Open the UI element, and from the drop down menu choose "Remote SSH: Open
Configuration File". If there are multiple options, choose the
configuration file located in the same directory as your SSH key
(~/.ssh/config in my setup). If you are still unsure which file is the correct
one, connect to Apocrita with the ssh -v abc123@vscode.hpc.qmul.ac.uk
command.
$ ssh -v abc123@vscode.hpc.qmul.ac.uk
OpenSSH_8.2p1 Ubuntu-4ubuntu0.2, OpenSSL 1.1.1f  31 Mar 2020
debug1: Reading configuration data /home/user/.ssh/config
debug1: Reading configuration data /etc/ssh/ssh_config
...
The tested config files will be mentioned in the first few debug lines.
Once you find the correct config file, in my case it's /home/user/.ssh/config,
edit in the following snippet to create an "alias":
Host apocrita
    HostName vscode.hpc.qmul.ac.uk
    User <USERNAME>
    IdentityFile ~/.ssh/id_rsa
Remember to replace <USERNAME> with your Apocrita username and the
identity file directory with your own (if different). If you have named the
"alias" differently, remember to substitute "apocrita" with your choice in the
following section. A more thorough guide can be found on the
remote development documentation.
Testing the connection
We are ready to connect to Apocrita for the first time using VS Code. Open the UI element and choose "Connect to host" (Figure 2), and then choose "apocrita" (Figure 3). This will prompt you to enter your Apocrita password (Figure 4).
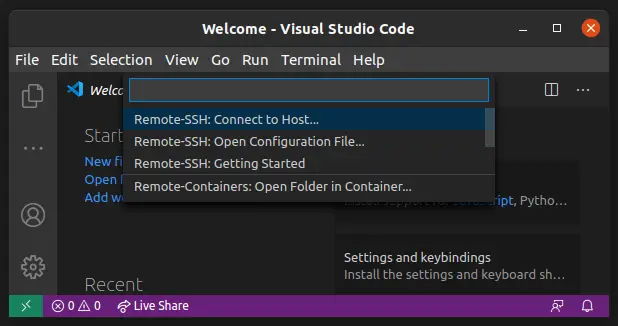
Figure 2: Initiate server selection
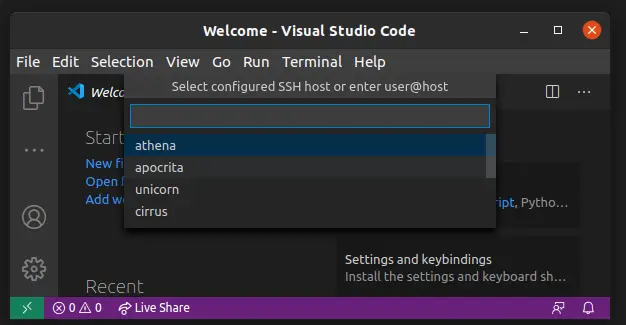 Figure 3: Choose the appropriate host to connect to
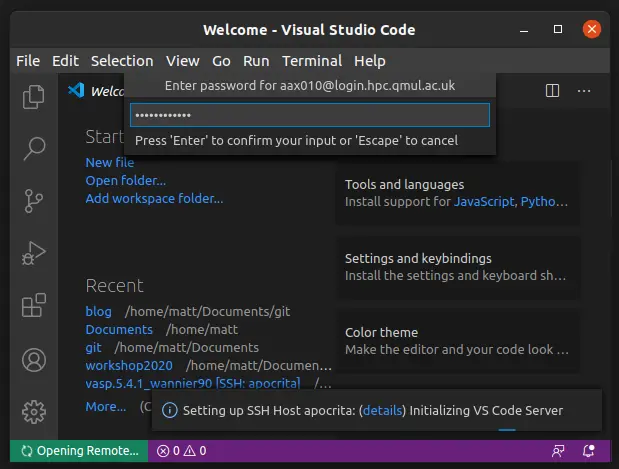
Figure 4: Password entry
If everything has worked correctly, the UI element will read "Opening Remote.." and an information pop up will notify us that a VS Code Server is being initialised. Once a connection has been established, we will be able to open our home directory, through "Open Folder", as seen on Figure 5.
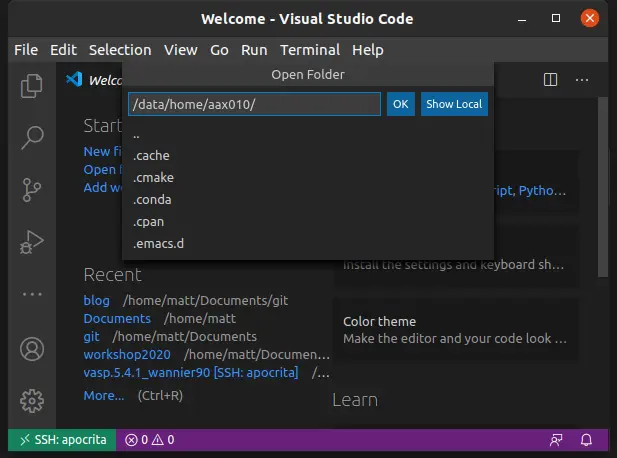
Figure 5: Connection established with Apocrita
Data security
VS Code has a large range of extensions. However be mindful that some extensions may be malicious, while others may not be deliberately malicious but may expose your data, create a reverse proxy, or upload it to cloud service. Extensions don't have much in terms of permissions management: they not only have access to the file system but also have the ability to run binaries and start network services. Be very careful which extension you decide to use, and check the authorship (although beware that author verification is easily obtained with a verified domain) and security aspect of each individual extension, We recommend also removing ones that you no longer require, since extensions automatically update, and a bait-and-switch attack is possible by the author if they later introduce malicious code into a previously clean extension.
Telemetry
VS Code, by default, is set to send telemetry data back to Microsoft. These processes reside on the vscode server as long as the user is connected. For performance and privacy considerations we strongly suggest you perform the following action.
Navigate to File - Preferences - Online Services Settings.
Under Telemetry, set the setting level to Off.