Visualising HEALPix results with Jupyter Notebook

In this tutorial we'll be showing you how to visualise HEALPix results using Jupyter Notebook in our OnDemand appliance on the Apocrita HPC cluster. We'll start with installing the required Python packages before demonstrating how to run the Healpy tutorial.
Information about running other components of HEALPix not covered in this tutorial can be found on our docs site.
Installation
Using pip and virtualenv
The installation procedure follows the standard method for virtual environments on a shared system.
Virtual environments allow us to install different collections of Python packages without experiencing conflicts, or versioning issues.
Loading applications using the module command
Running module avail python will show the available Python versions; module
load python without the version number will load the default version into the
current session, and will also provide the pip and virtualenv commands. We'll
load the python/3.8.5 module to match the version of Python compatible with
HEALPix.
module load python/3.8.5
Installing the Python packages in a virtual environment
We will now demonstrate how to create a virtual environment and install the
healpy and ipykernel packages, using the following commands:
virtualenv ~/healpix
source ~/healpix/bin/activate
pip install healpy ipykernel
The above commands only need to be run once - the ~/healpix virtual
environment will continue to exist until removed or renamed.
Activating virtual environments within Jupyter Notebook
By default, virtual environments are not available within Jupyter Notebook. To enable this functionality, simply run the following command with the virtual environment activated:
python -m ipykernel install --user --name healpix
You only need to run this command once. The virtual environment will remain available within Jupyter Notebook as long as it is present in the original install location.
A similar process for Anaconda is also documented here.
Running the tutorial
Starting a Jupyter Notebook session in OnDemand
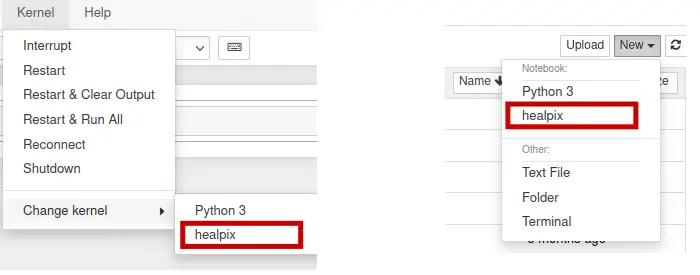
Now if you open a new Jupyter Notebook (CPU) session from OnDemand, you will
notice that the new healpix virtual environment is available under the
Kernel -> Change Kernel menu, with the name healpix. Similarly, it will
be available as an option under the File -> New notebook menu.
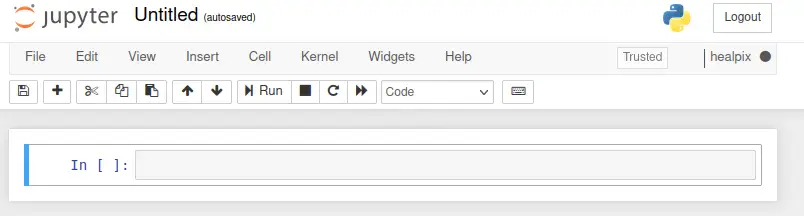
Let's create a new notebook and use the healpix kernel. Save this file
as healpy_tutorial.ipynb. Note that the currently active environment is
displayed in the top right corner.
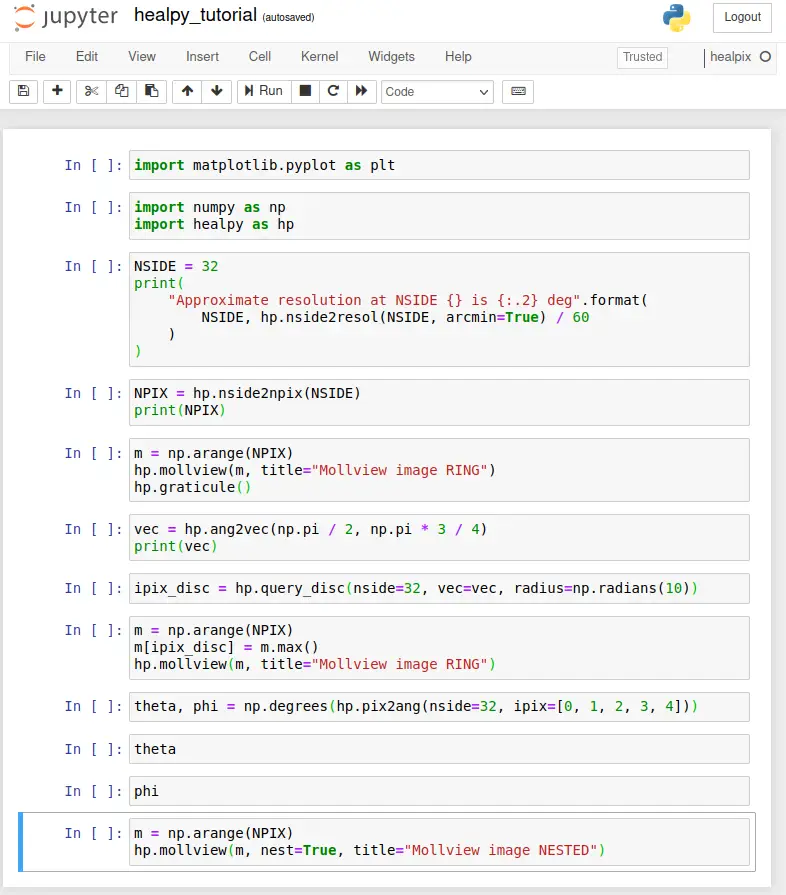
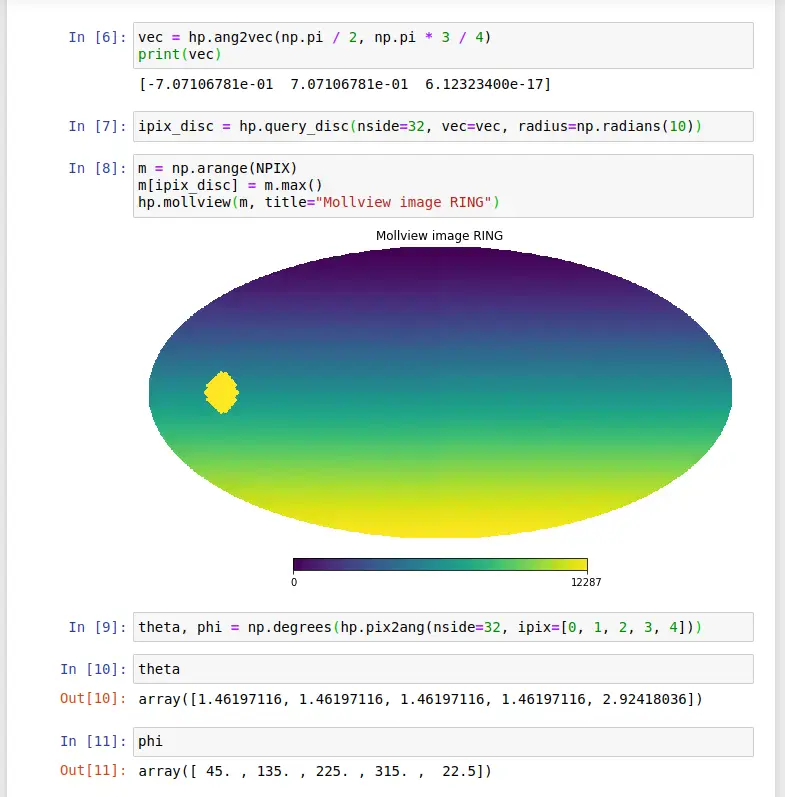
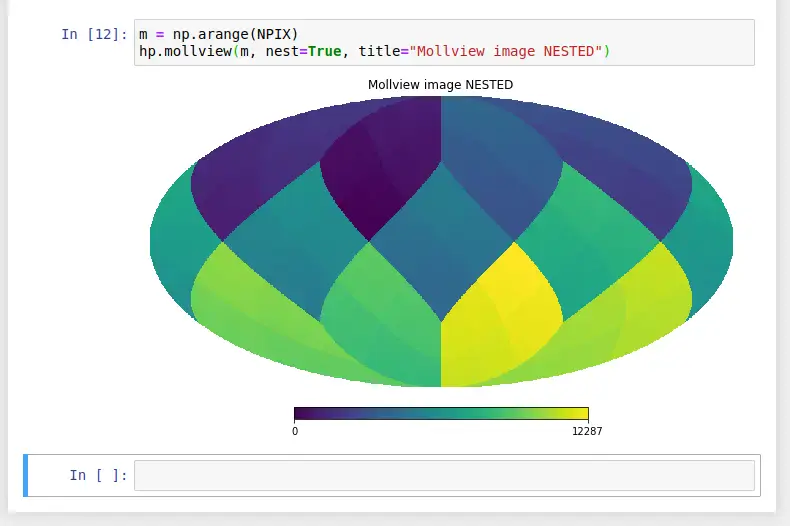
Now, enter the Python code as published in the tutorial:
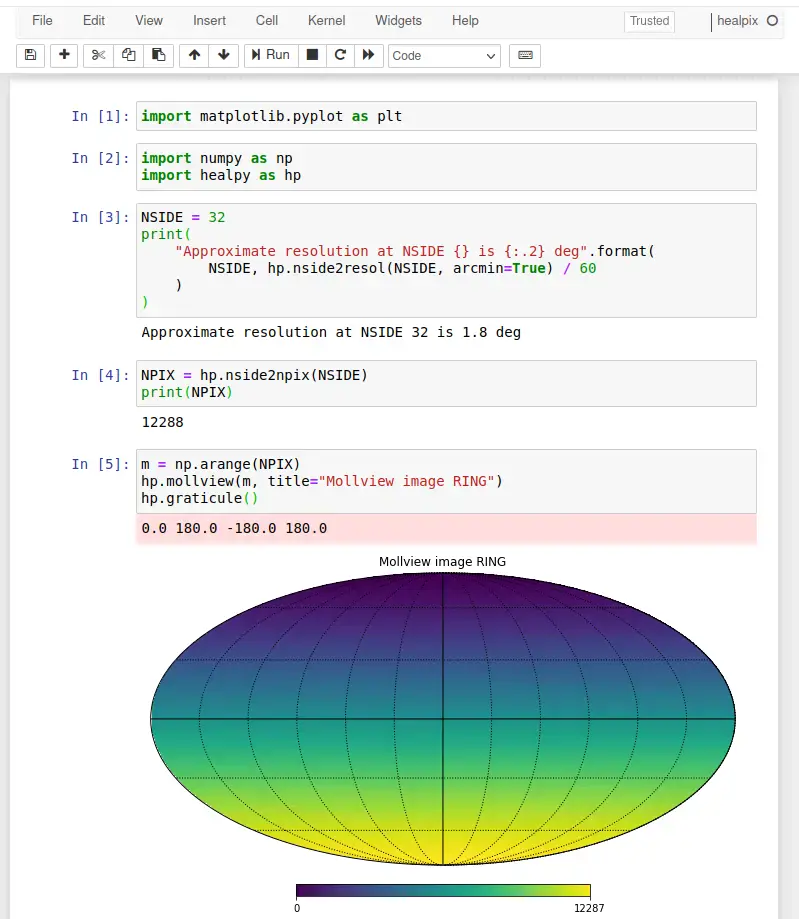
Click Run to execute the notebook and produce the same output as published in the tutorial, shown below:
Exiting the Jupyter Notebook session
When you have finished your analysis on Jupyter Notebook, please remember to delete your job by clicking the red Delete button within the OnDemand appliance to return the requested resources to the cluster queues.